How Can We Help?
NetApp – DNS Delegation Load Balancing Steps
DNS Delegation Load Balancing Steps
The following is based on How to set up DNS load balancing in clustered Data ONTAP. With that the DNS delegation load balancing steps.
To use DNS Zones you must configure your DNS server to delegate DNS authority for the subdomain to the SVM.
Besides giving the least used LIF, delegation also skips any downed LIFs for better availability. Round Robin does not know if a lif is down or up.
If using a domain that is in the same tree as in an existing zone, you must use delegation (see KB link above for conditional forward delegation)
With DNS load balancing enabled, a storage administrator can choose to allow the new built-in load balancer to balance the client LIF network access on the basis of the load of the cluster. This DNS server resolves names to LIFs based on the weight of a LIF. A Vserver can be associated with a DNS load-balancing zone, and LIFs can be either created or modified in order to be associated with a particular FQDN. A fully-qualified domain name can be added to a LIF to create a DNS load-balancing zone by specifying a “dns-zone” parameter on the network interface create command.
Two methods that can be used to specify the weight of a LIF: The storage administrator can specify a LIF weight, or the LIF weight can be generated based on the load of the cluster. Ultimately, this feature helps to balance the overall utilization of the cluster. It does not increase the performance of any one individual node; rather, it ensures that each node is more evenly used. The result is better performance utilization from the entire cluster.
DNS load balancing also improves the simplicity of maintaining the cluster. Instead of manually determining which LIFs are used when mounting a particular global namespace, the administrator can let the system dynamically decide which LIF is the most appropriate. And after a LIF is chosen, that LIF can be migrated to a different node automatically to ensure that the network load remains balanced throughout the cluster.
Cluster
- NetBIOS name of the Vserver is “svm” and we will use “svm” for the DNS load balance.
- Create a zone for your desired LIFs (data LIFs ONLY, not management if using management)
network interface modify -vserver <svm_name> -lif <LIF1>,<LIF2>,<etc> -dns-zone <Desired_zone_name>

Example: cluster1::> net int mod -vserver svm -lif svm_cifs_lif1,svm_cifs_lif2 -dns-zone svm.demo.netapp.com
To REMOVE a DNS-ZONE the “” parameter won’t blank it since the default non-set is “none” so to unset a zone use network interface modify -dns-zone none
- Verify – membership
cluster1::> network interface show-zones

Listen For

Vserver Interface Name DNS Zone DNS Query

-------------- -------------- ---------------- ----------

svm

svm_cifs_lif1 svm.demo.netapp.com true

svm_cifs_lif2 svm.demo.netapp.com true

Cluster

cluster1-01_clus1 none false

cluster1-01_clus2 none false

cluster1-02_clus1 none false

cluster1-02_clus2 none false

cluster1

cluster1-01_mgmt1 none false

cluster1-02_mgmt1 none false

cluster_mgmt none false

9 entries were displayed.
Logical Status Network Current Current Is
Vserver Interface Admin/Oper Address/Mask Node Port Home
———– ———- ———- —————— ————- ——- —-
Cluster
cluster1-01_clus1 up/up 169.254.172.65/16 cluster1-01 e0a true
cluster1-01_clus2 up/up 169.254.109.18/16 cluster1-01 e0b true
cluster1-02_clus1 up/up 169.254.82.149/16 cluster1-02 e0a true
cluster1-02_clus2 up/up 169.254.126.16/16 cluster1-02 e0b true
cluster1
cluster1-01_mgmt1 up/up 192.168.0.111/24 cluster1-01 e0c true
cluster1-02_mgmt1 up/up 192.168.0.112/24 cluster1-02 e0c true
cluster_mgmt up/up 192.168.0.101/24 cluster1-01 e0c true
svm
svm_cifs_lif1 up/up 192.168.0.201/24 cluster1-01 e0e true
svm_cifs_lif2 up/up 192.168.0.202/24 cluster1-02 e0e true
9 entries were displayed.
vserver lif dns-zone listen-for-dns-query
——- —————– ——– ——————–
Cluster cluster1-01_clus1 none false
Cluster cluster1-01_clus2 none false
Cluster cluster1-02_clus1 none false
Cluster cluster1-02_clus2 none false
cluster1 cluster1-01_mgmt1 none false
cluster1 cluster1-02_mgmt1 none false
cluster1 cluster_mgmt none false
svm svm_cifs_lif1 svm.demo.netapp.com true
svm svm_cifs_lif2 svm.demo.netapp.com true
9 entries were displayed.
Windows 2008/2012 DNS Server – Delegation
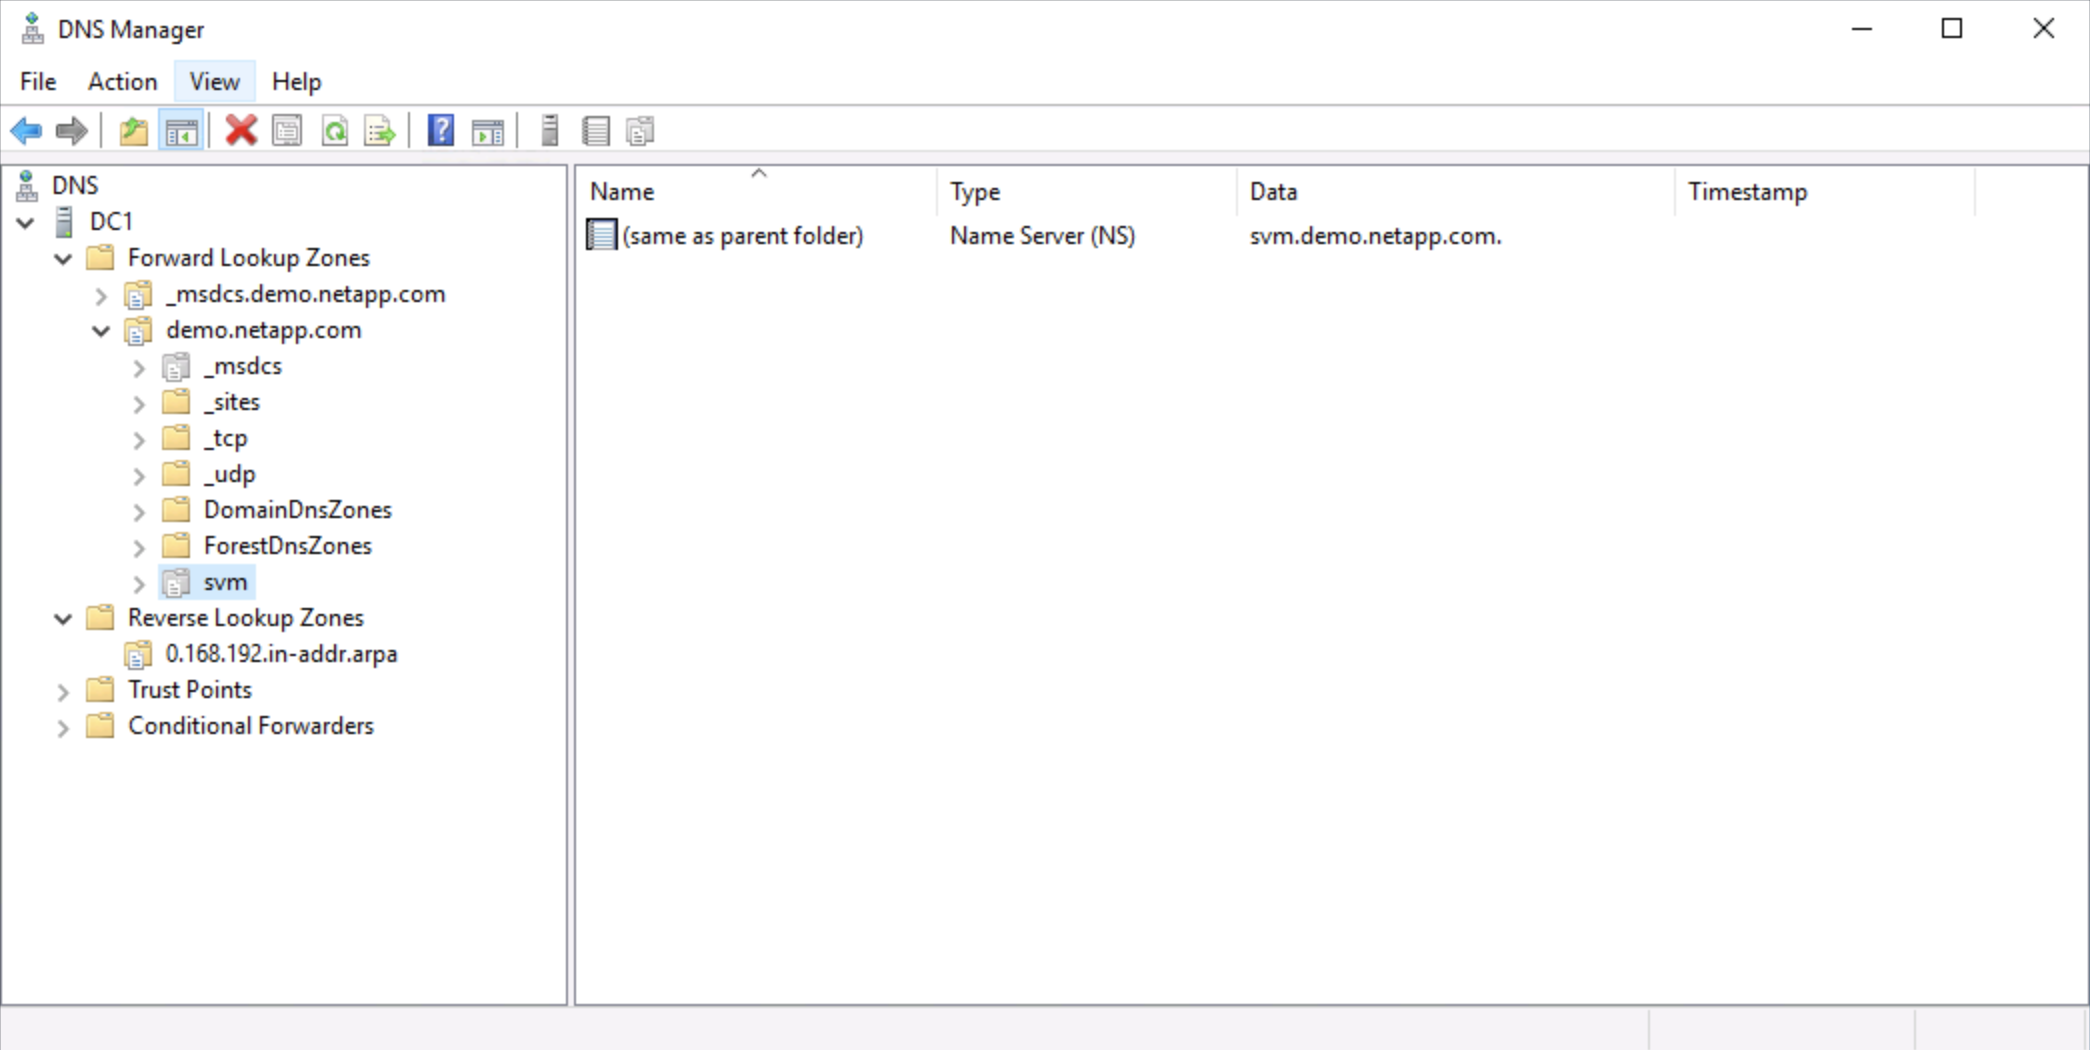
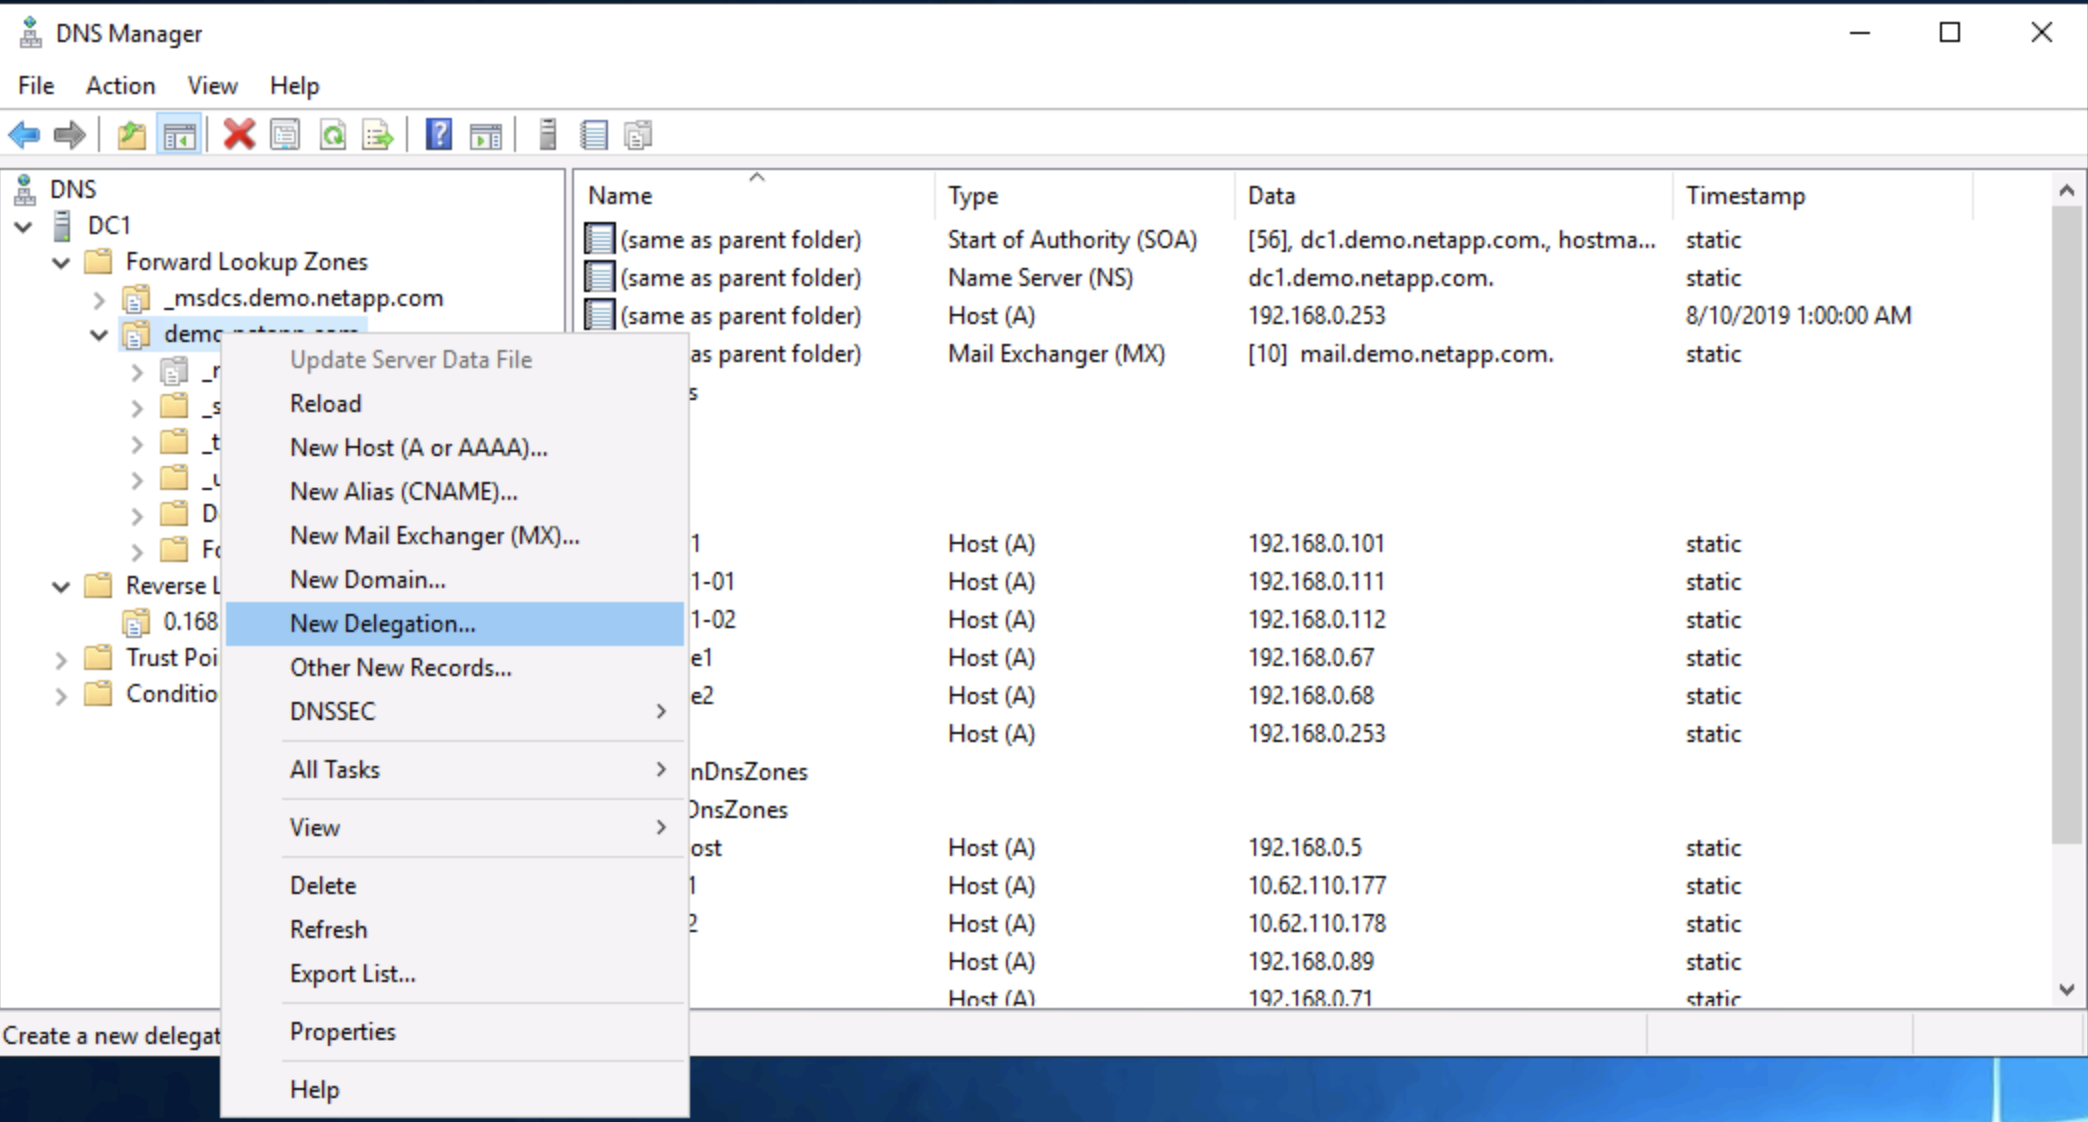
- Launch DNS Manager
- Expand Forward Lookup Zones for the zone that will contain the delegation
- Right-Click and choose “New Delegation…”

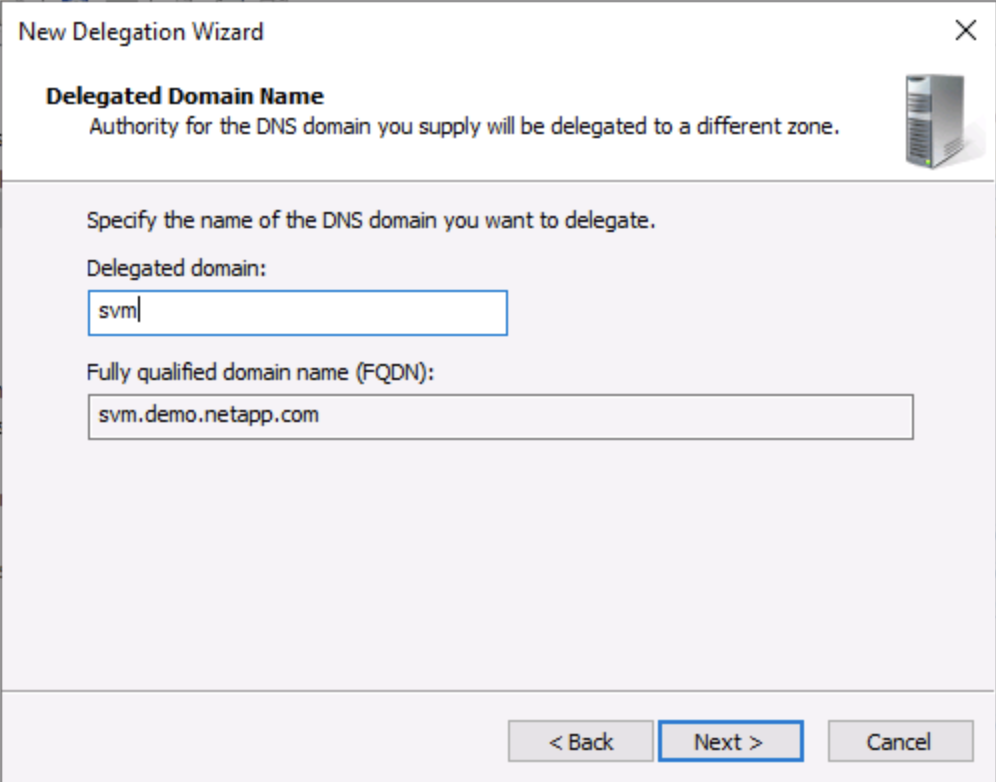
- Enter the prefix for the delegated domain
- This example uses “svm” as the prefix
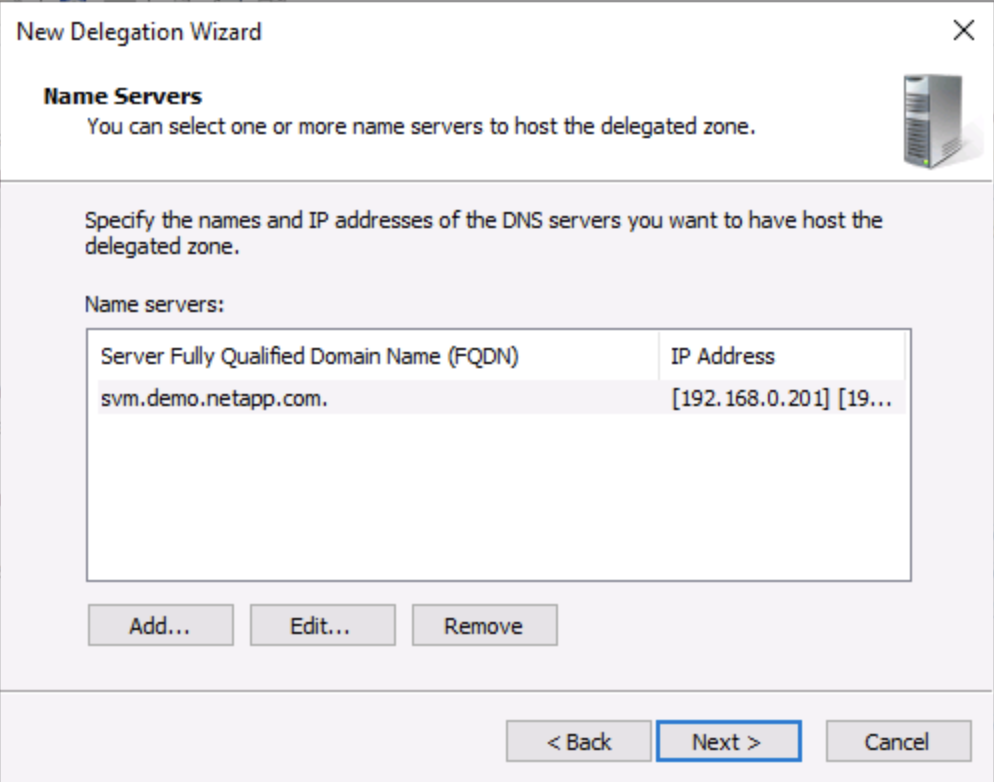
- In the FQDN field, highlight and copy the FQDN “svm.demo.netapp.com”

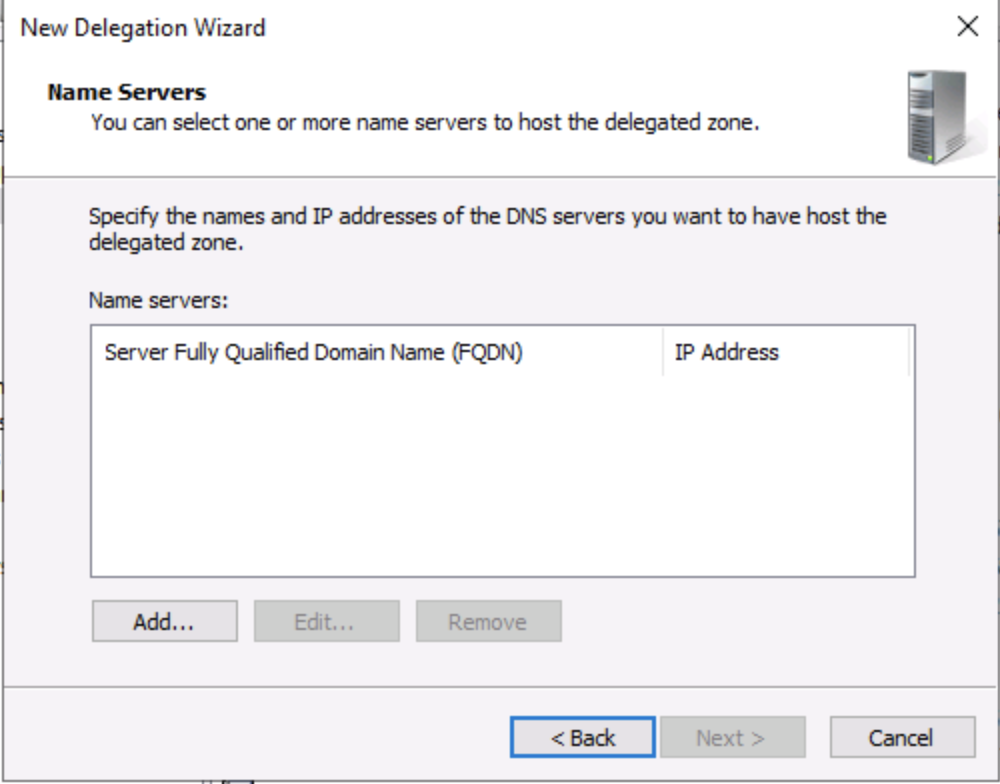
- Click “Next” above then click “Add…” below
- Hit Next and do the following:
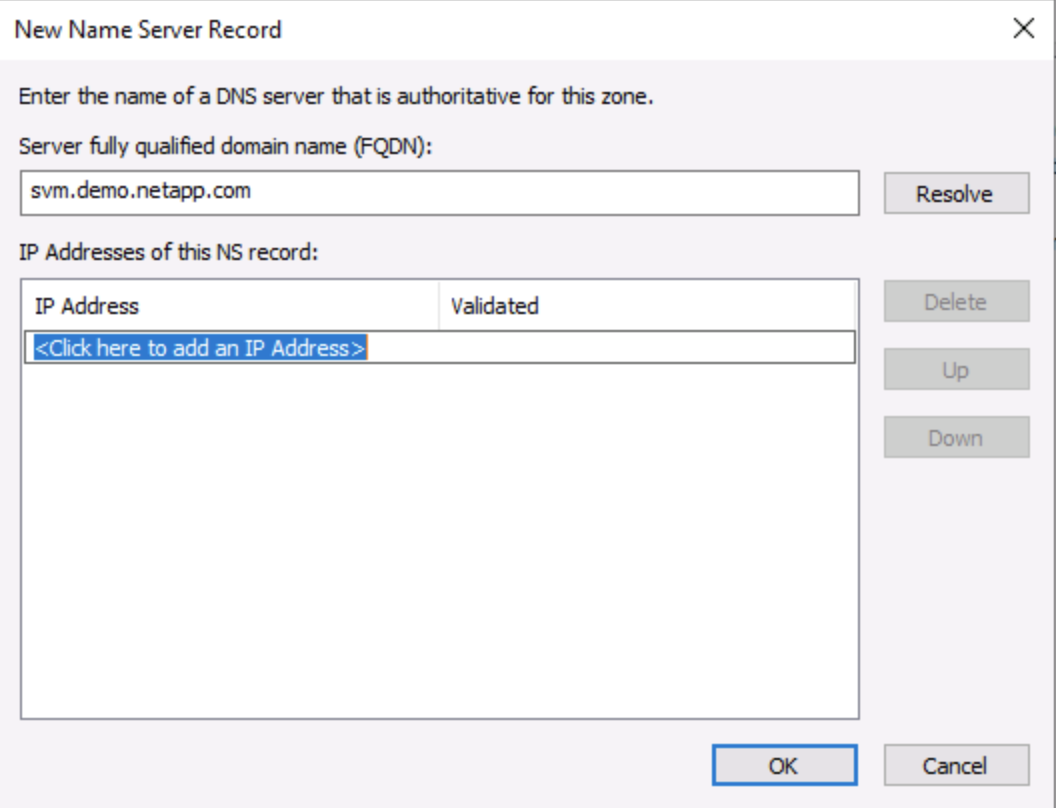
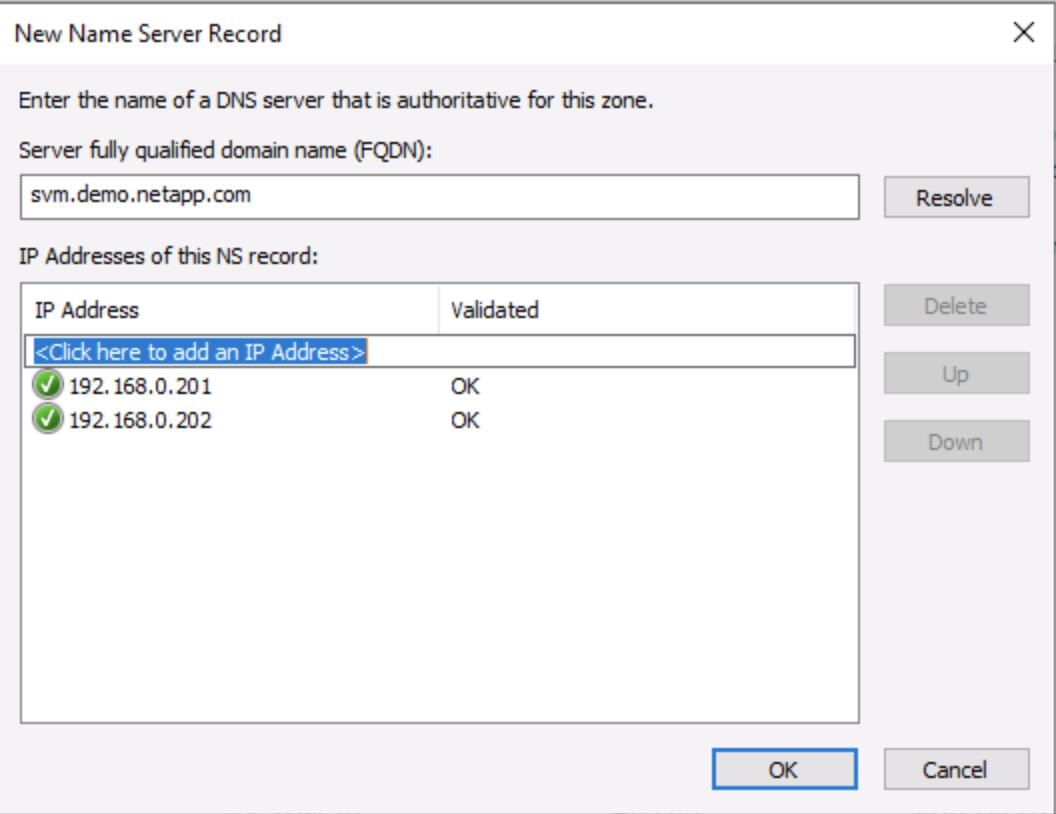
- Paste in the FQDN that you copied but DO NOT HIT RESOLVE

- Enter the IP addresses from your dns-zone LIF pool. The address will be confirmed by a green check mark and “Validated” will say “OK”

- Click “OK” after you have entered all of the LIF IPs

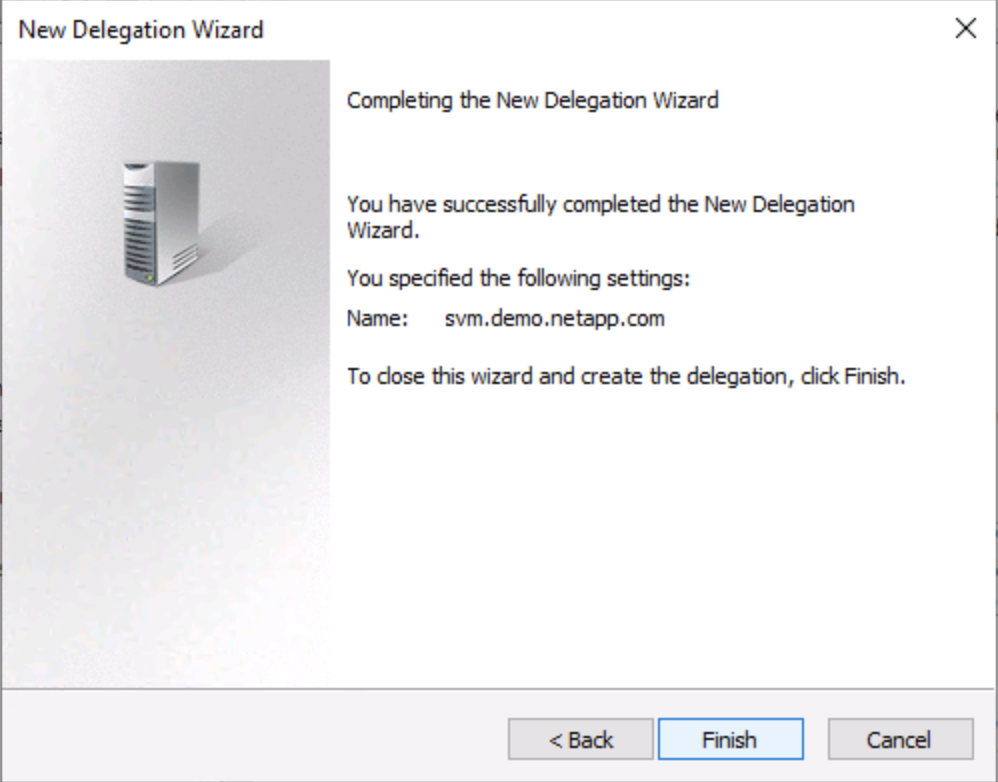
- Click “Next” and finish out the wizard

- When complete you should see the following

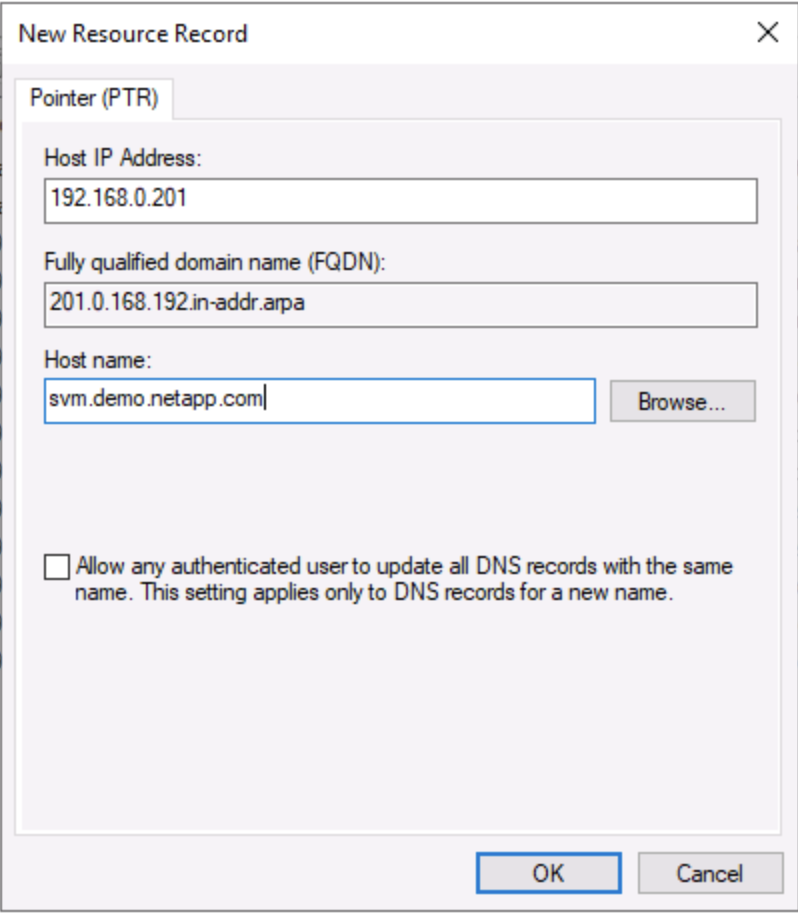
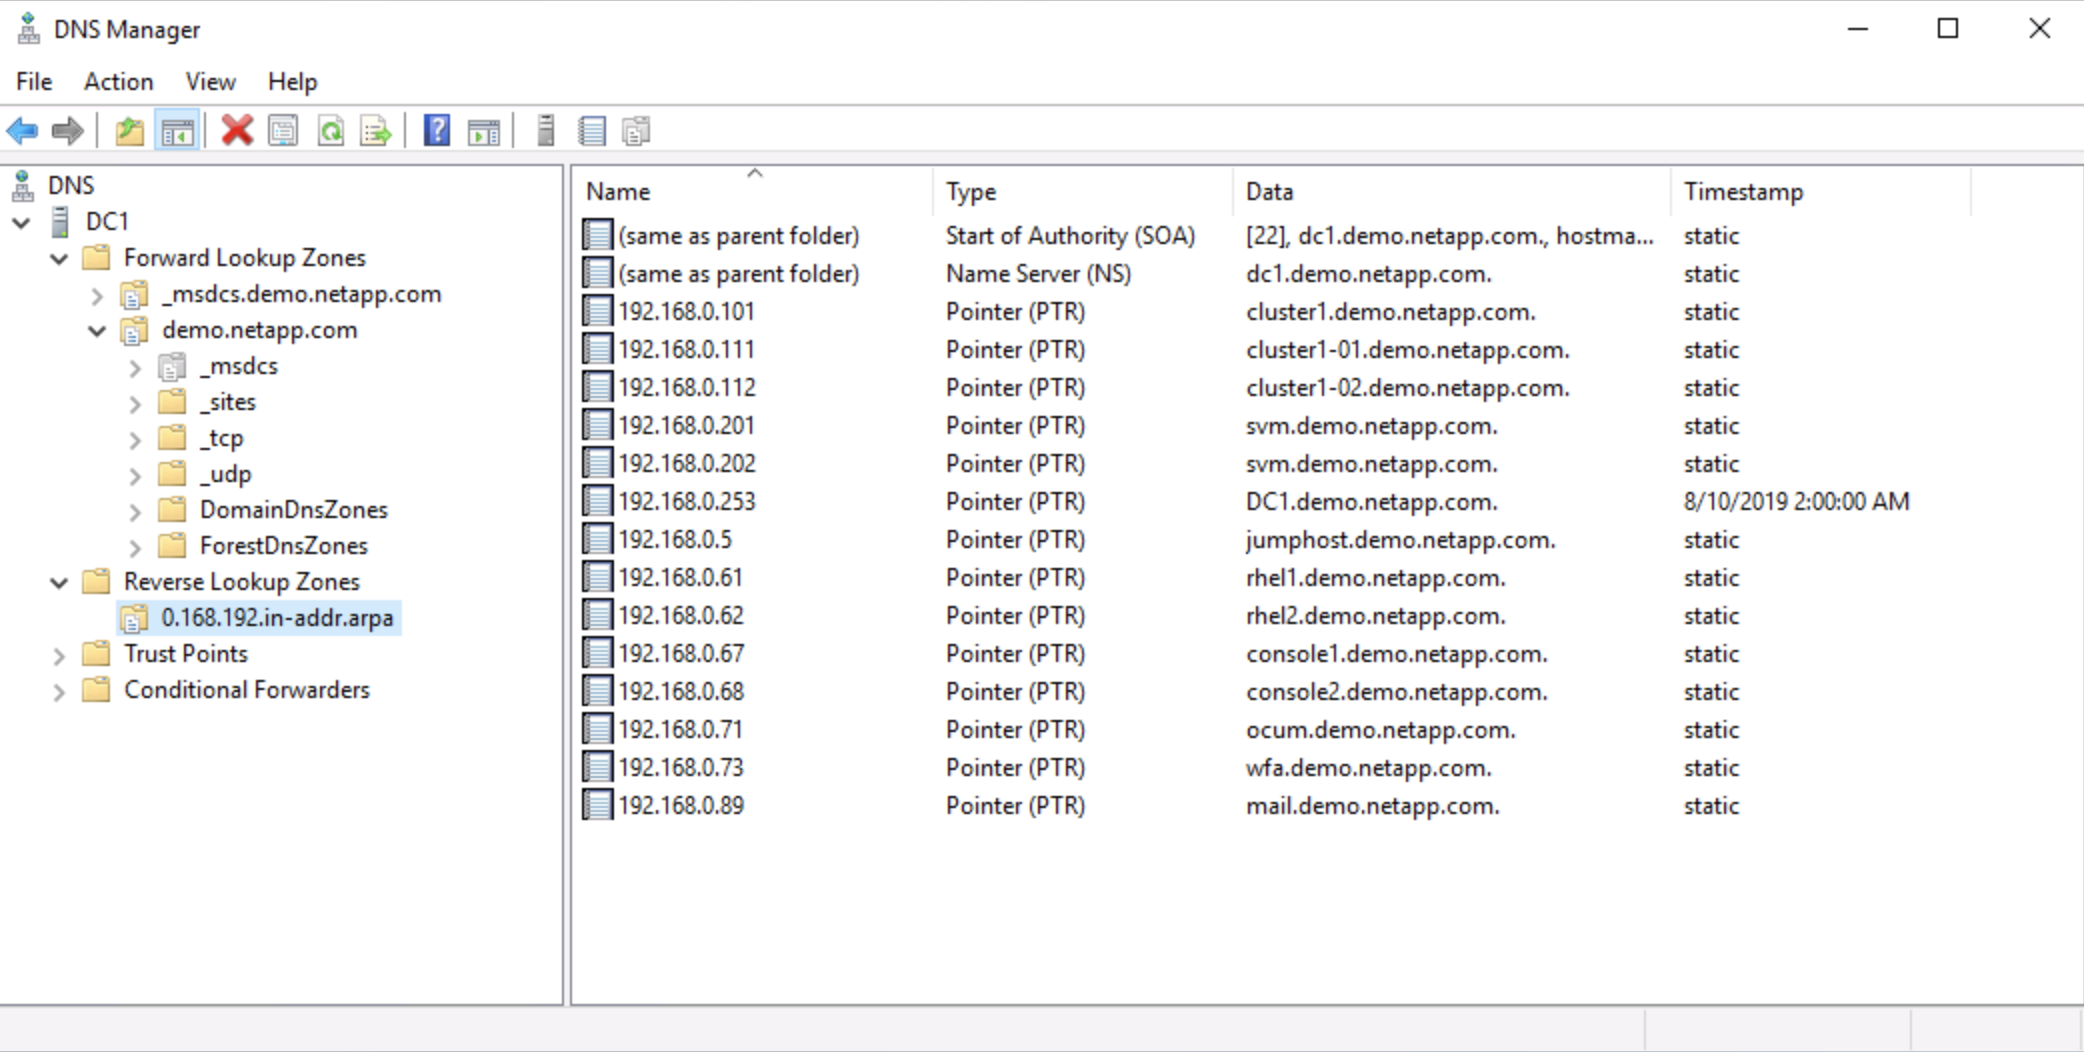
- Create a reverse lookup zone for all data LIFS


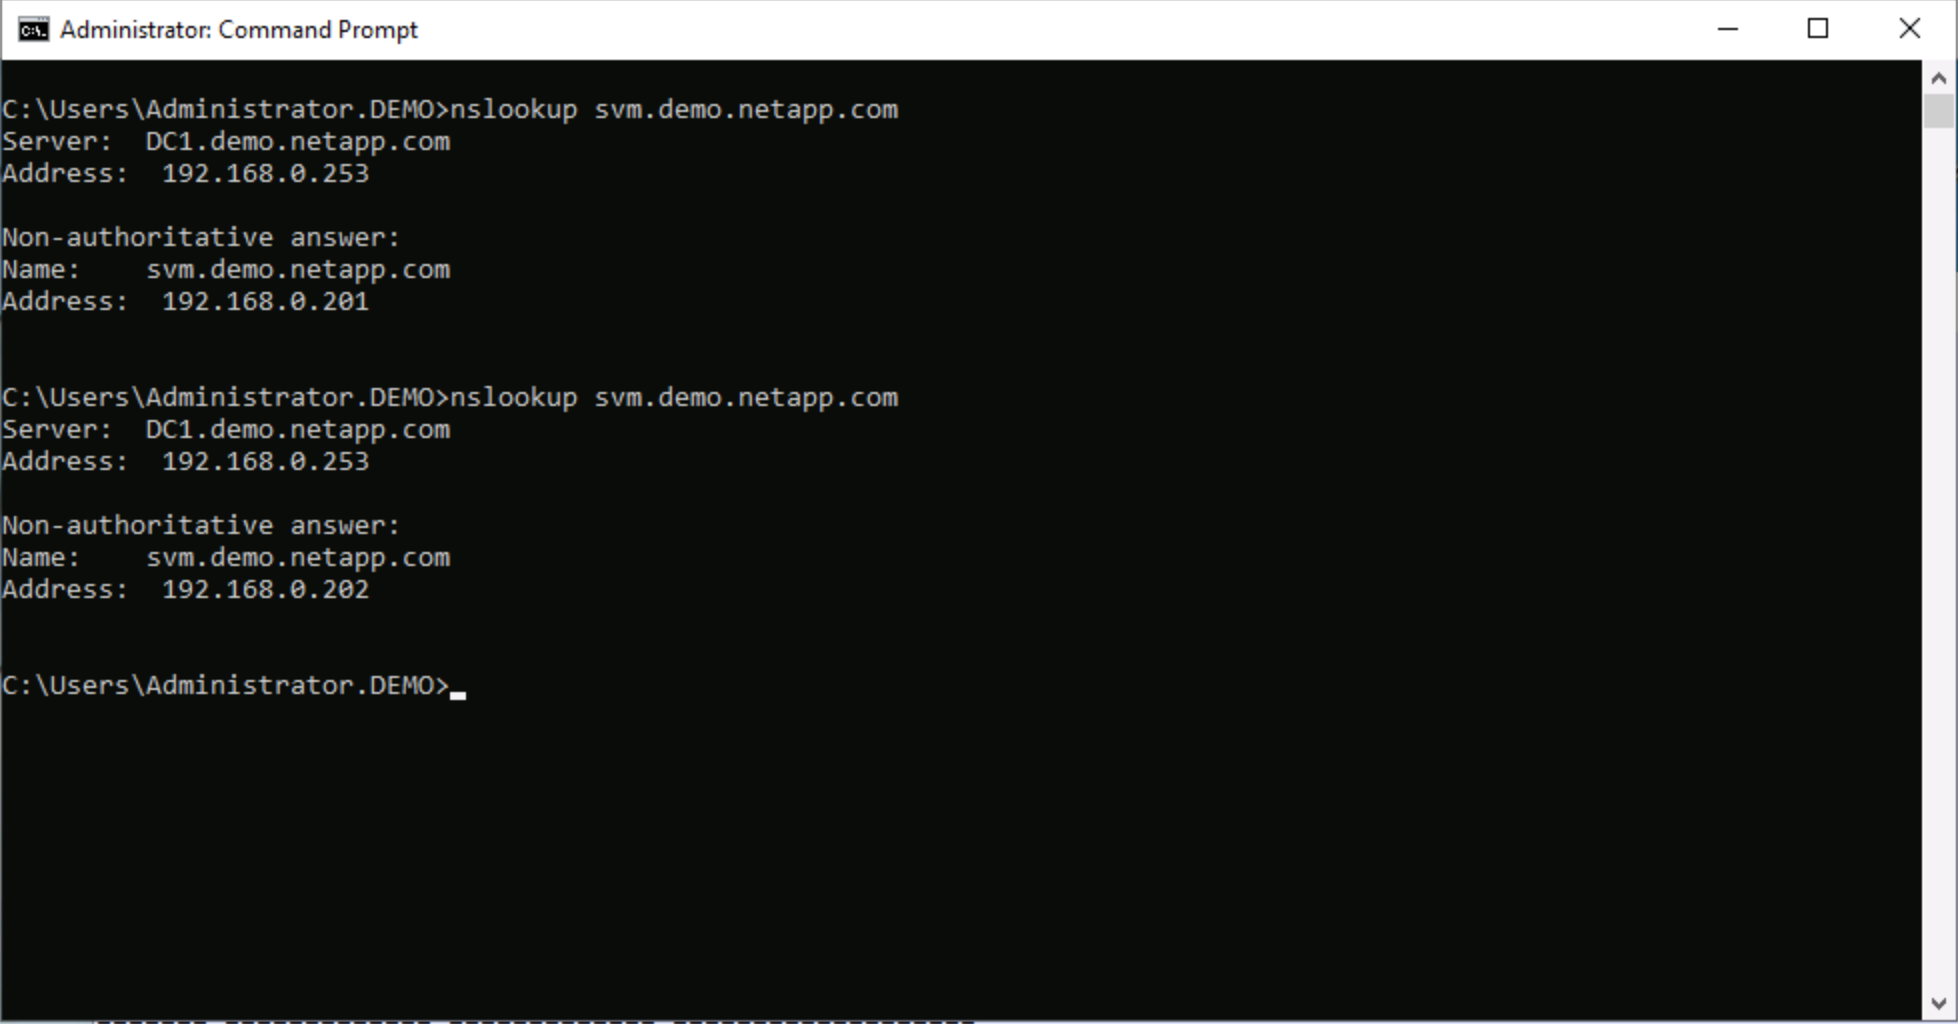
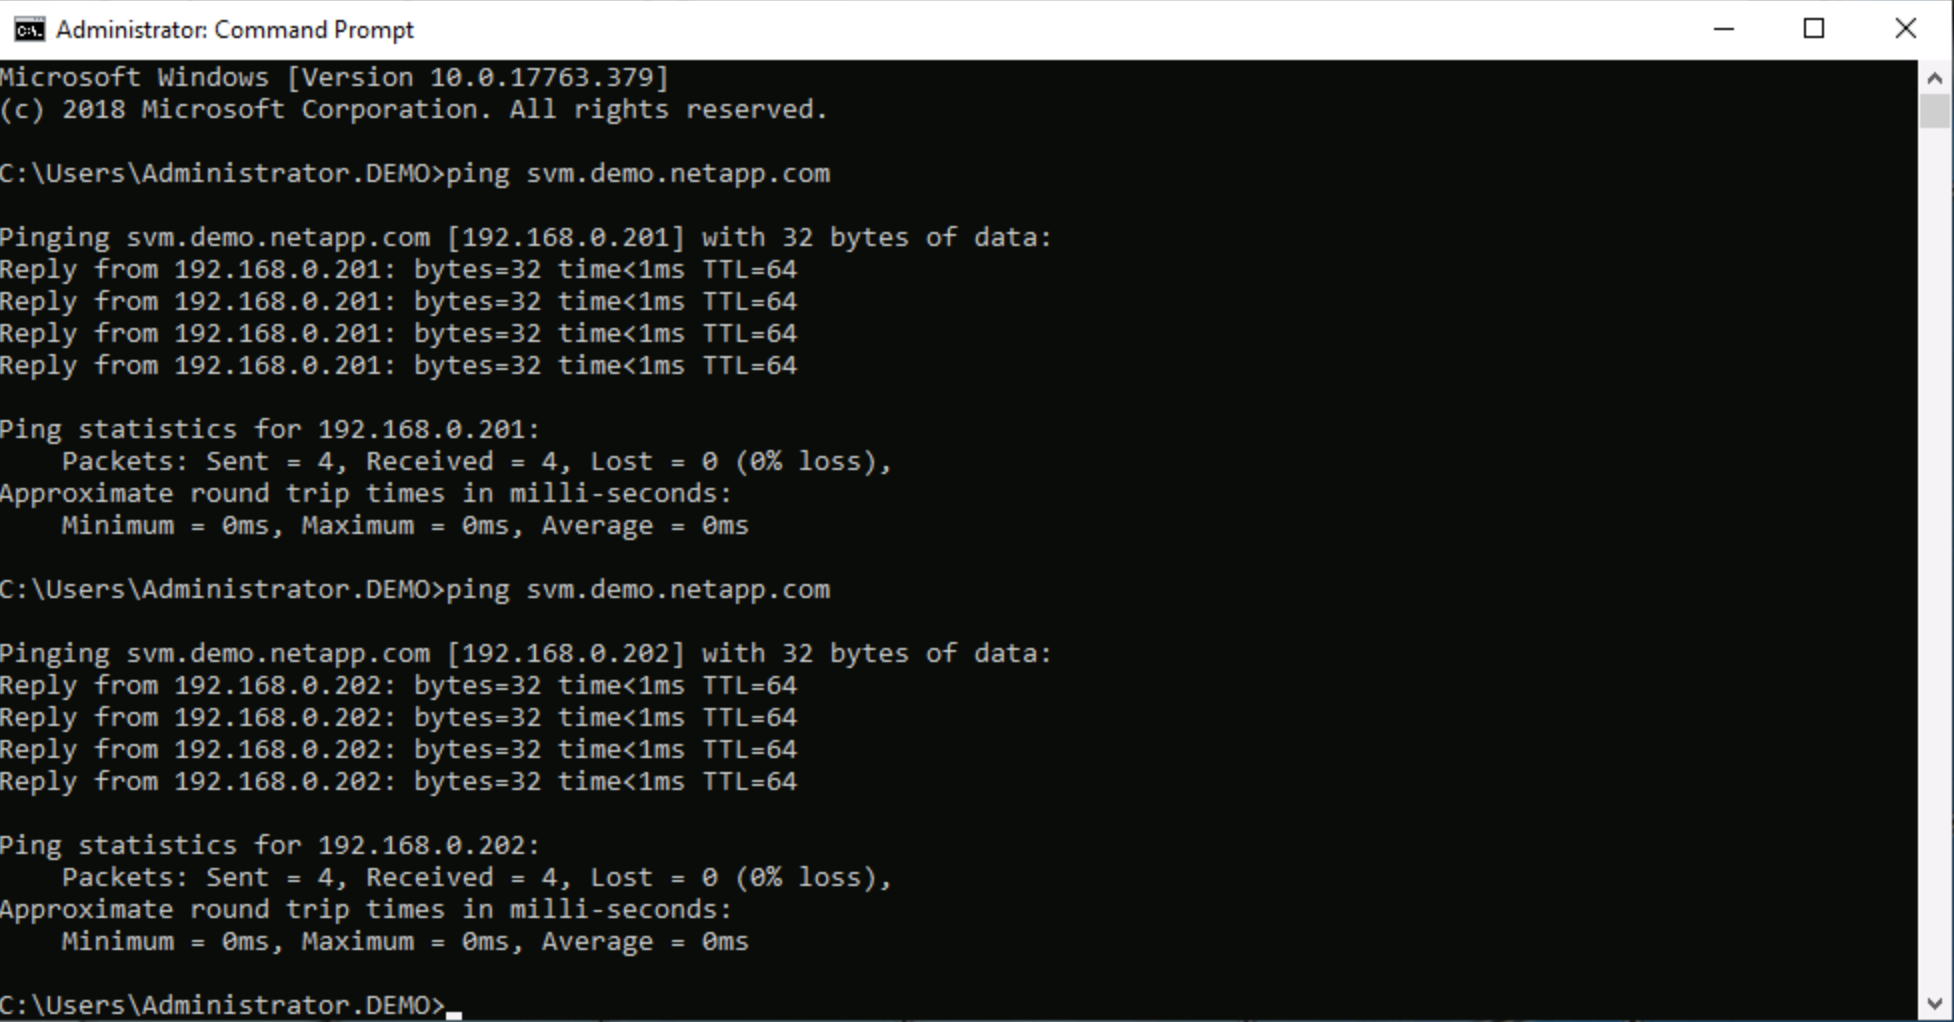
- Ping test and nslookup and see the IPs change

- Paste in the FQDN that you copied but DO NOT HIT RESOLVE